Mount Wellington Driving Test Routes - Restricted & Full

Practise REAL, CURRENT test routes.
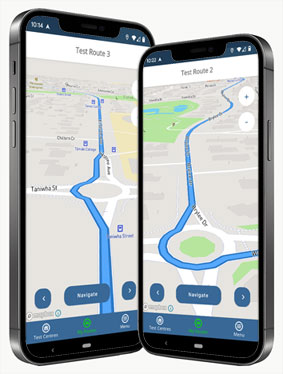
Download the #1 app! ★★★★★


A sample Mount Wellington test route starting from the centre at C4/4 Pacific Rise. It takes around 22 min 42 s to drive this 10.0 km practice route, in preparation for your Auckland Restricted (1R) and Full (1F) test.
Sample Route Map

10.0 km
Route Length
22 min 42 s
Duration
21
Steps
5
Routes in App
Sample Route Directions
| # | Instruction | Duration | Distance |
|---|---|---|---|
| 1 | Head east toward Pacific Rise | 0 min 8 s | 49 m |
| 2 | Turn left onto Pacific Rise | 2 min 25 s | 326 m |
| 3 | Turn left onto Sylvia Park Rd | 0 min 20 s | 153 m |
| 4 | Turn left at the 1st cross street onto Mount Wellington Hwy/ |
3 min 9 s | 1.2 km |
| 5 | Head north on Mount Wellington Hwy/ |
0 min 47 s | 340 m |
| 6 | Turn right onto Penrose Rd/ Continue to follow Waipuna Rd/ |
1 min 35 s | 560 m |
| 7 | Turn right onto Carbine Rd (signs for State Hwy 1 N/ |
0 min 55 s | 514 m |
| 8 | Head south on Carbine Rd | 2 min 17 s | 942 m |
| 9 | Turn left onto Gabador Pl | 0 min 34 s | 382 m |
| 10 | Turn right onto Fisher Cres | 1 min 7 s | 575 m |
| 11 | Turn left onto Carbine Rd | 0 min 12 s | 128 m |
| 12 | Head south on Carbine Rd toward Panama Rd | 0 min 11 s | 82 m |
| 13 | Turn right onto Panama Rd | 1 min 37 s | 925 m |
| 14 | Turn left onto Mount Wellington Hwy/ |
1 min 34 s | 989 m |
| 15 | Turn right onto Portage Rd (signs for Penrose/ |
1 min 7 s | 565 m |
| 16 | Turn right onto Great South Rd (signs for Great S Rd/ |
0 min 9 s | 39 m |
| 17 | Head north on Great South Rd toward Abattoir Ln | 2 min 2 s | 1.2 km |
| 18 | Turn right onto Sylvia Park Rd | 0 min 25 s | 175 m |
| 19 | Head northeast on Sylvia Park Rd toward Pacific Rise | 0 min 42 s | 506 m |
| 20 | Turn left onto Pacific Rise | 1 min 13 s | 289 m |
| 21 | Turn left | 0 min 13 s | 49 m |
Important: This is a mock route and may differ from your test. Always check this sample route before practising to ensure it is suitable for learners to drive, safe, and compliant with local traffic laws.
For accurate 1R & 1F routes, download the app.
For accurate 1R & 1F routes, download the app.
VTNZ Pacific Rise
Address: C4/4 Pacific Rise, Mount Wellington, Auckland 1060
Hours: Monday to Friday: 8am to 4:30pm
Website: Click Here
Map preview
Map Directions
Street View
Services at this centre
Admin services
Theory tests
Class 1 Restricted (1R)
Class 1 Full (1F)
Notes
Theory tests
Test hours are weekdays until 3:30pm.
★★★★★
Get the #1 NZ Practice App